FREE Shipping on all U.S. orders $200+
FREE Shipping on all U.S. orders $200+
Hat Care

The Making Of A Panama Hat
August 05, 2017 7 min read
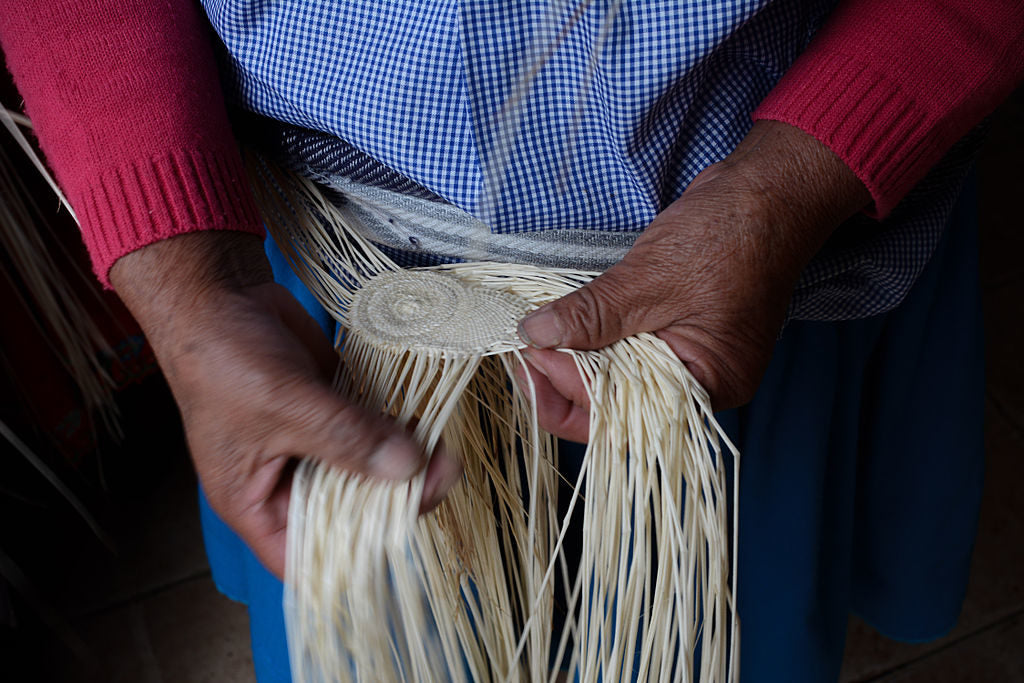
Have you ever taken time to admire the beautifully fine weave on a high-quality Panama hat? The intricate detail looks machine made, but the highest-quality hats are made by hand in artisan villages in Ecuador. See these hat making experts in action and learn more about what your hat is made of with this step-by-step photo guide.
The Tradition of the Panama Hat
In spite of the name, Panama hats are not actually from Panama. These hats are and always have been the handiwork of Ecuadorian artisans. While it’s not clear exactly how they came to be known as Panama hats, each step of the hat construction process happens in forests, homes and small workshops in Ecuador. This craft tradition is often passed down from generation to generation within families and communities. Older generations hone their craft over the years and pass their knowledge down to the younger generations. This craft tradition is not limited to a specific age or gender. Anyone who gains the skill or knowledge can take part in the hat making process. Because many hat makers work in their own homes, their “factories” are often simple workshop rooms or outdoor areas with the right equipment. For the most part, these hats are made by hand. Though simple tools and machinery are used in some parts of the process, the weaving is 100% done by hand. Skilled craftspeople make tight, fine weaves to build a hat from the crown out. Each step in the hat making process is done by a specific person with finely honed skills for that specific step. But before all this can happen, the straw must be harvested.Step 1: Obtaining Collogos for Hatmaking
 Image credit: ELDAN23/CC BY-SA 4.0/Wikimedia Commons
Step 2: Turning Green Plant Fibers into Straw
 Image credit: BlankeVla/CC BY 2.0/Wikimedia Commons
Step 3: Starting the Hat
 Image credit: M M/CC BY-SA 2.0/Wikimedia Commons
Step 4: Weaving the Crown and Brim
 Image credit: hatsfromtheheart.ec/CC BY-SA 4.0/Wikimedia Commons
Step 5: Finishing the Brim
 Image credit: Peter van der Sluijs/CC BY-SA 3.0/Wikimedia Commons
Step 6: Polishing Up the Brim
With the brim tightening finished, yet another specialist gets to work. La cortadora/le cortador trims off all the loose ends of the straw, but not to a finished length. The brims will still look relatively rough at this point. But, there is no longer a large spray of loose straw forming a halo around the crown. If there are other long straw ends on the hat, la cortadora/le cortador will trim them off. Why is there straw leftover at this point? Well, la cortadora/le cortador is also responsible for washing the hat, and these hats then need to hang dry to avoid any moisture buildup, which might discolor or warp the hats. So, they’re pinned to a line from the loose straw ends. Hats are also bleached during this step if necessary. After they’re cleaned and bleached, a worker known as la apaleadora/le apaleador beats each individual hat with a mallet-like wooden tool. This hard impact softens the straw and also lightens its color, resulting in a flattened but flexible hat with a more refined look and feel. The hats then go back to la cortadora/le cortador, who will finish the hat with sharp scissors or a razor, cutting off all the remaining unwoven straw ends so the hat is smooth and neat all over. Low-quality Panama hats don’t enjoy this careful finishing process. The backwoven brim is a sign of high quality—any stitching, glue or unfinished edges around the brim are an indicator of lesser quality.Step 7: The Hat Takes Its Final Form
With the hats trimmed, backwoven and beaten, they’re a bit misshapen. It won’t take long to fix that. La planchadora/le planchador uses a hat form similar to that used during weaving, only placed on a flat surface, and irons the hat’s crown and brim to remove any wrinkles and make it crisp. Then a blocker will take the ironed hat and use traditional steaming methods to form the hats into different shapes. Up to this point, it’s not clear what finished style the hats will take on. All Panama hats are woven and ironed into in the same basic shape. The blocker uses steam and specialized tools such as hat forms and stretchers to soften and shape the hat with creases, indentations and other style indicators. The finished product may look like a cowboy-style gambler hat, distinctive optimo hat, classic teardrop fedora or gatsby fedora. Even pork pie hats and other iconic hat shapes can be blocked into the generic Panama hat form. This means that no matter which of our beautiful Panama hat styles suits your taste, you’ll be getting the same carefully crafted quality.Subscribe
Sign up to get the latest on sales, new releases and more …


